I have more design ideas than I’ll ever be able to write up as “proper” instructions. And really, if you already know the weave, many times all you need is a map to show you how the project comes together. I’m gathering some of those project maps here, in the hopes that you’ll be able to recreate the pieces – even without “proper” instructions. Please let me know if the maps aren’t clear enough (or if they are!)
I’m not making formal kits for most of these maps, but I am putting together shopping lists to make it easier to get the correct sizes in the right quantities. Please note that you don’t have to purchase everything in the list. If you happen to have a certain size on-hand already, or if you don’t want to fuss with some detail of the piece (those 10:19 rings for the Wiggly 6-in-1!) then just leave them out of your purchase.
Icicles
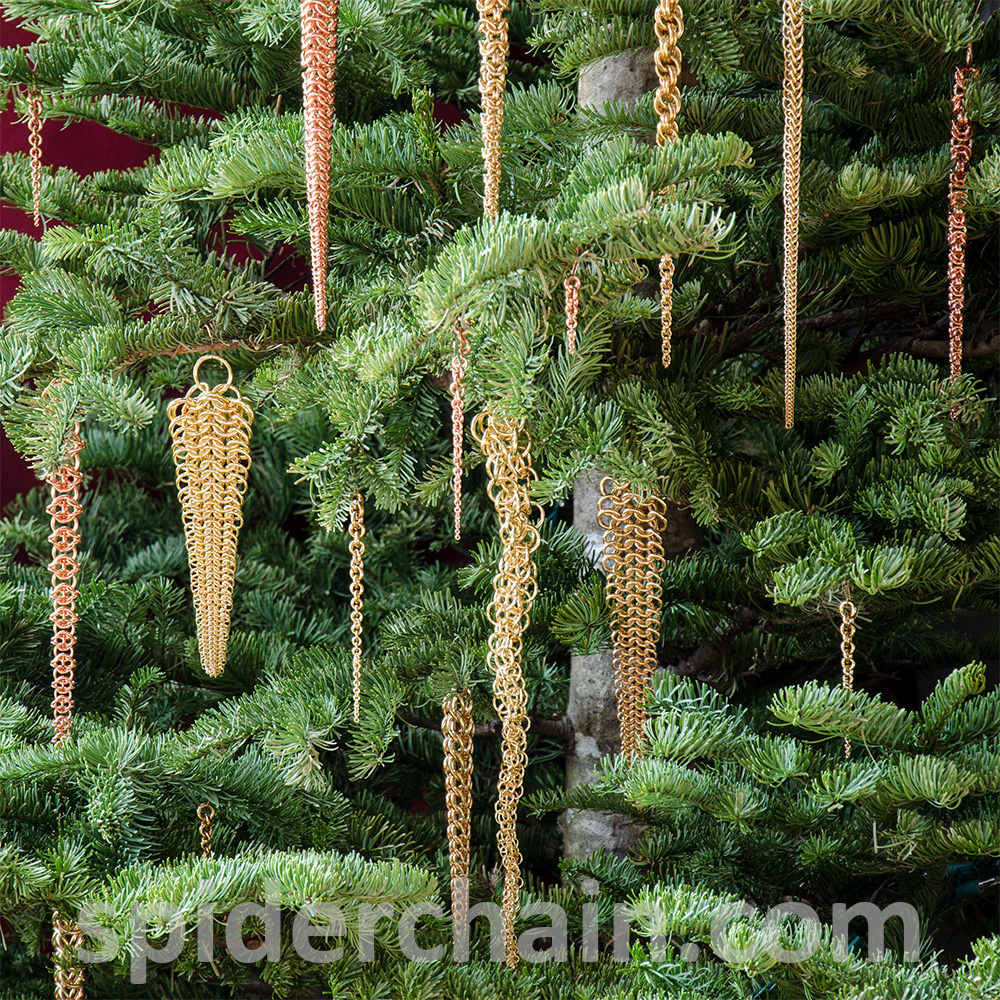 I like to make tapered chains – partly because it’s a good “real world” check of my size recommendations, but mostly because they’re pretty. I think they look great as Christmas ornaments. They’re also just fun.
More weaves added as time permits…
Tapered Full Persian Earrings
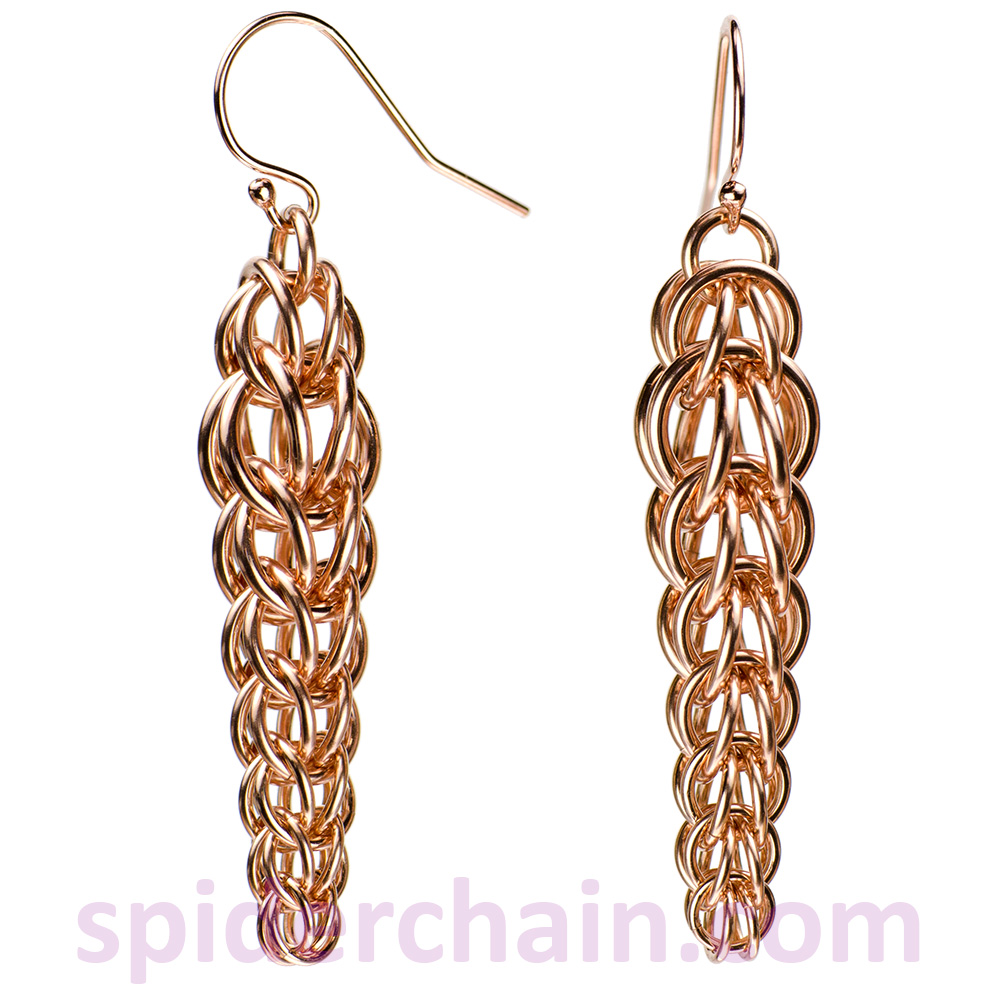 Full Persian is definitely my favorite round weave. (sssh! Don’t tell the other weaves!) A big reason for this is the grace of size changes in Full Persian chains.
So pretty. So elegant. So yummily Full Persian!
If you love these earrings but don’t already know how to make Full Persian, grab a copy of my first DVD.
Phaedra Pendant
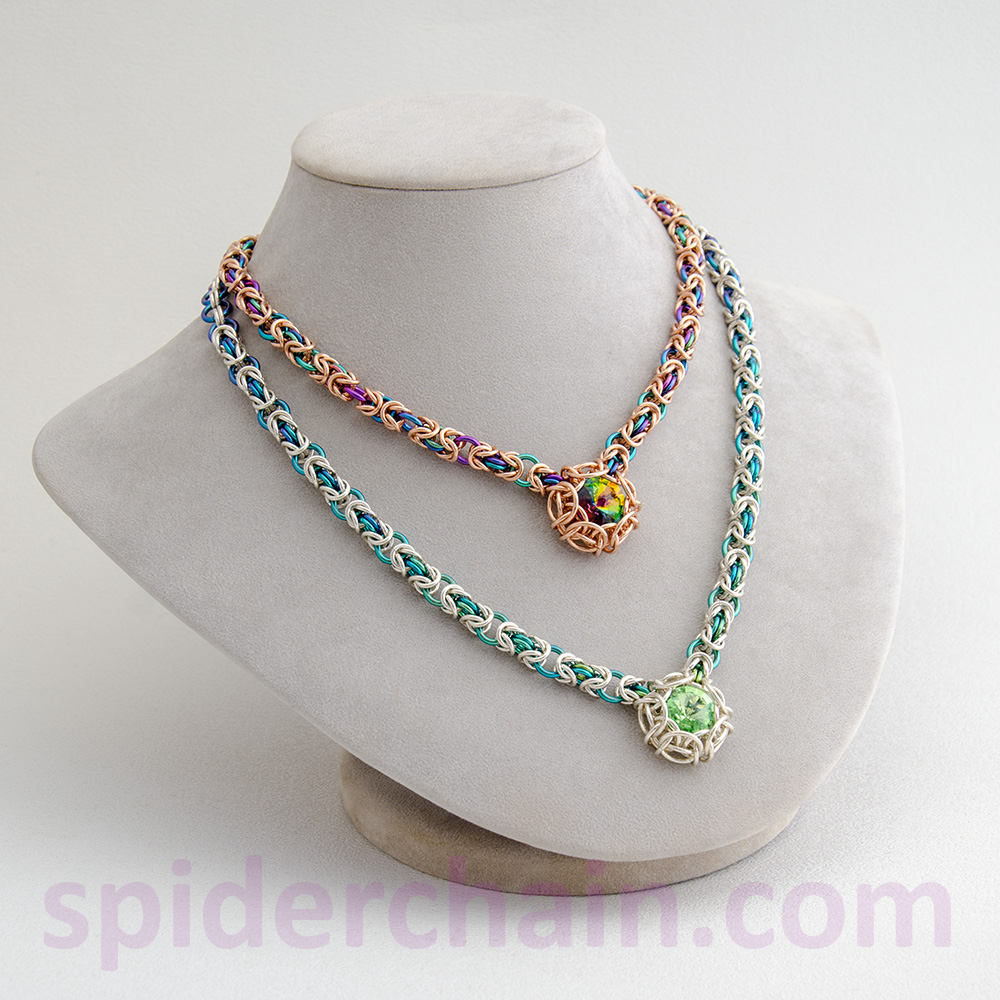
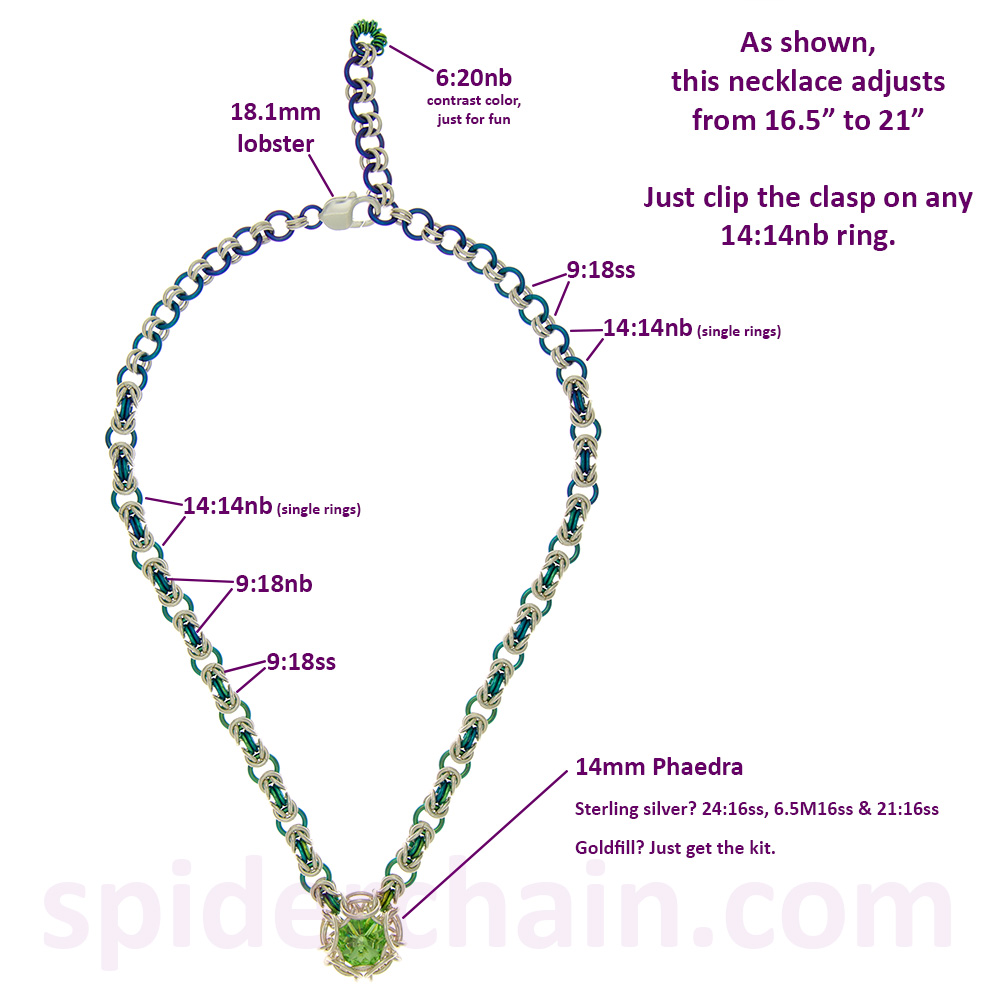 In January of 2016, Spiderchain started carrying kits for Karen Snyder’s Phaedra design. It’s a delicious design – like something from a dragon’s hoard. But a stand-alone gem is only so useful… I want to wear my dragon treasure!
I like the boldness of the 14mm size. It’s a pendant that takes center stage. And with such a noticeable piece, it’s important to have the length just perfect. Shown on the left:
- Rose goldfill with niobium Peacock mix – adjusted to 16.5″ – vitrail medium stone
- Sterling silver with niobium Water fade – adjusted to 21″ – peridot stone (which I do not carry)
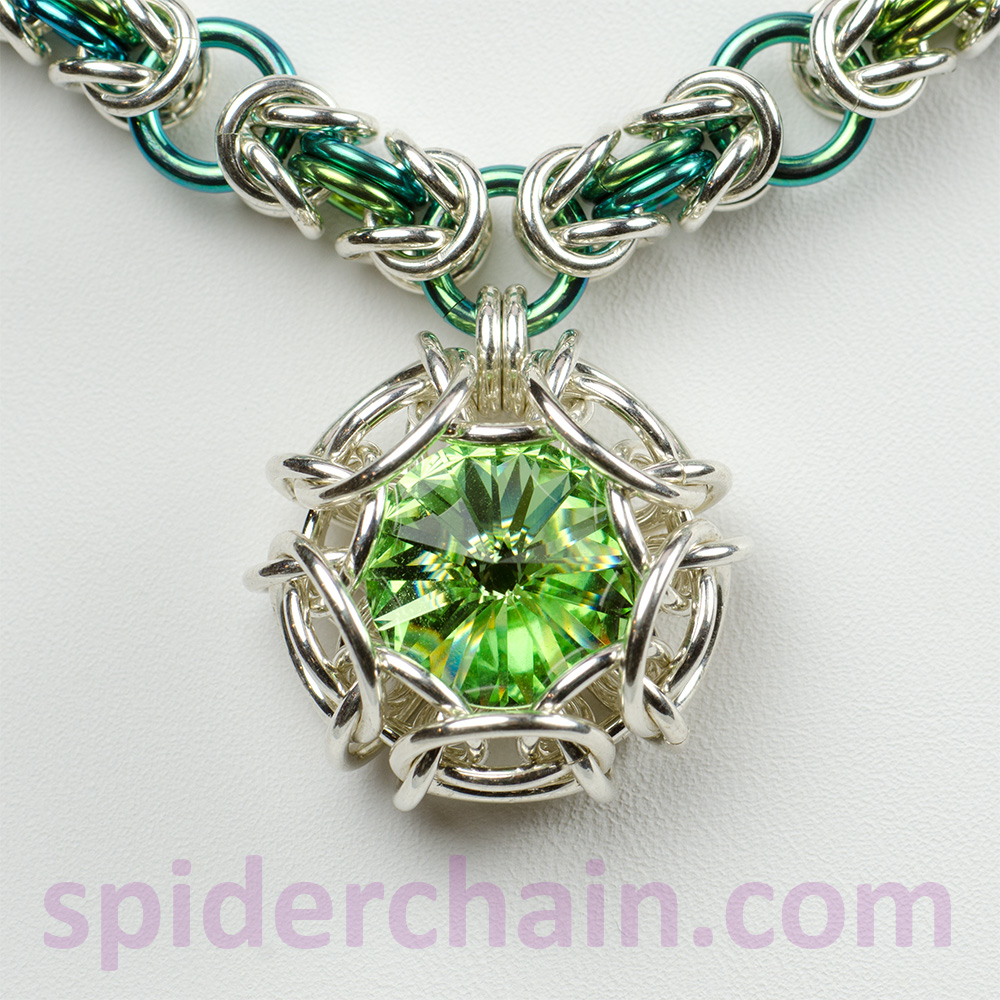
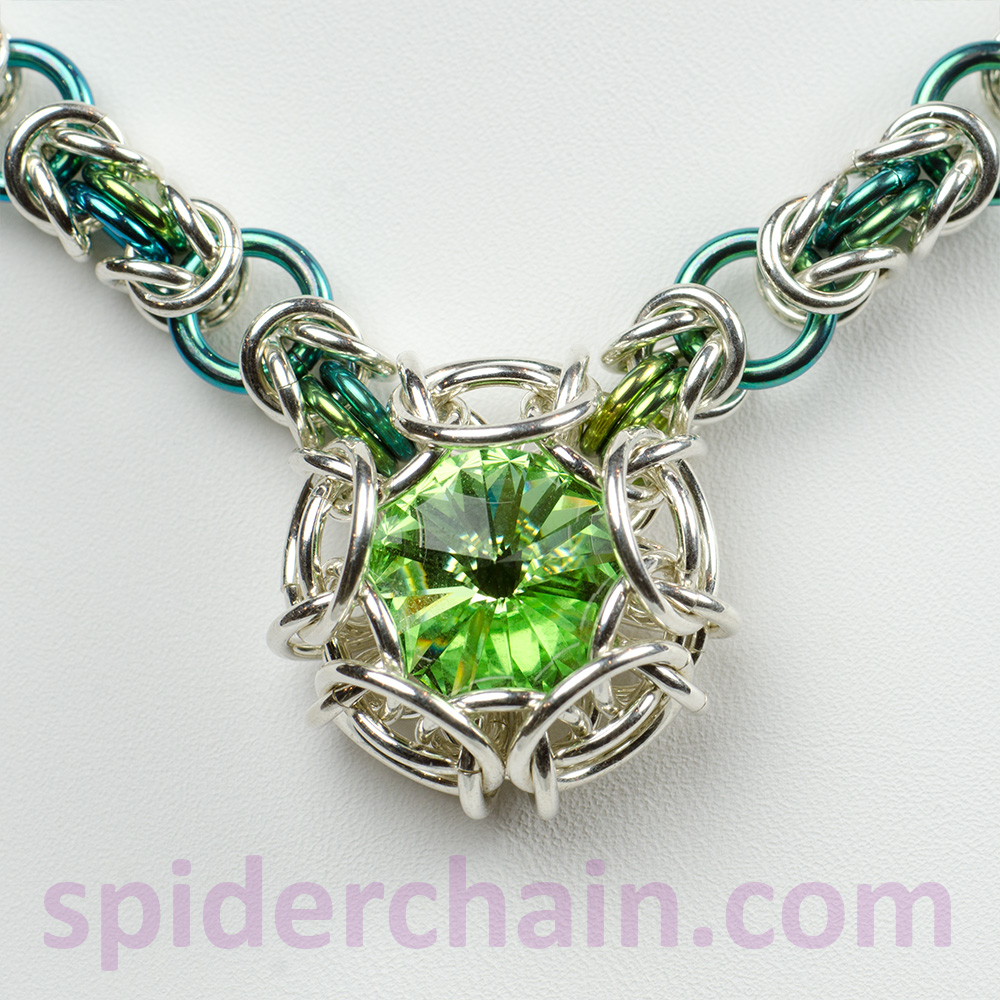 I originally set the pendant to hang from a single point (shown left). It’s easy to attach like that and seems very pendant-like. But then Mr. Spider pointed out that multiple attachment points (shown right) might make it feel more integrated with the Birdcage chain, and he was so right! However, it is trickier to attach this way. I recommend good light, good tools, and maybe some calming music.
Birthday Necklace
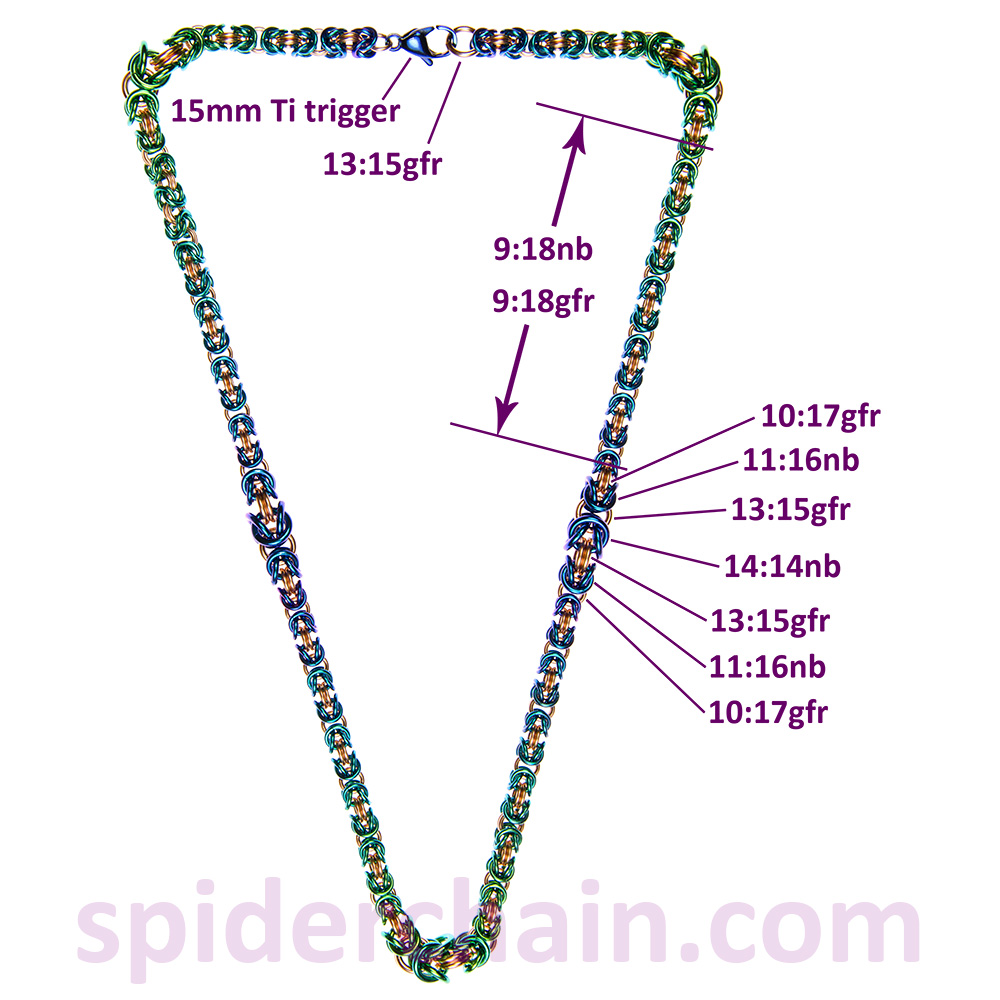
 So much fun! I can’t decide whether I’m more fond of the color fade or the subtle size graduations. There’s a short blog post on this project, if you want to read more about how it came together.
Tendrils Necklace
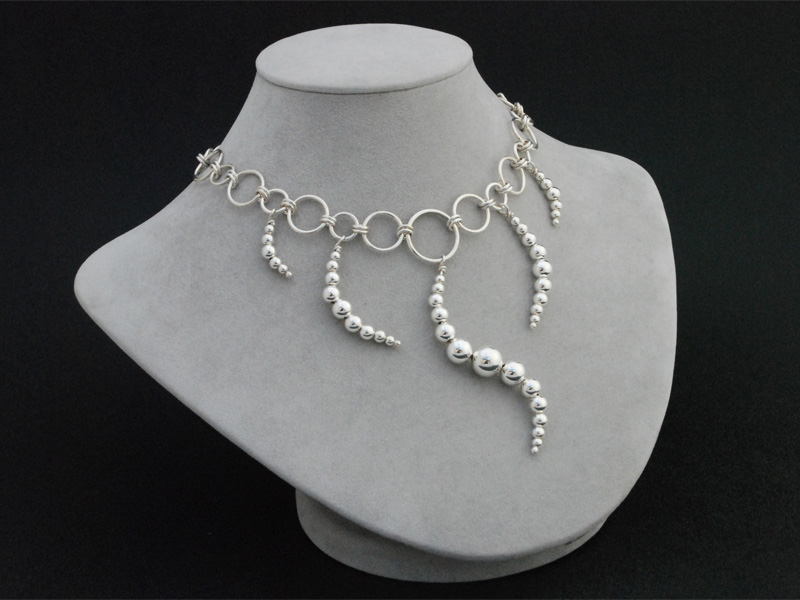 |
This is one of my “etude” designs. I sometimes create a piece in order to give students practice in a particular area. For instance, the Segmented Dragonscale project will give you a great deal of practice getting Dragonscale started, and starting is the trickiest part of that weave. This project? Not a tricky weave at all. But the ring sizes are challenging to close perfectly – that’s the teaching purpose for this particular etude. But it turns out to be a wonderfully graceful necklace as well! | 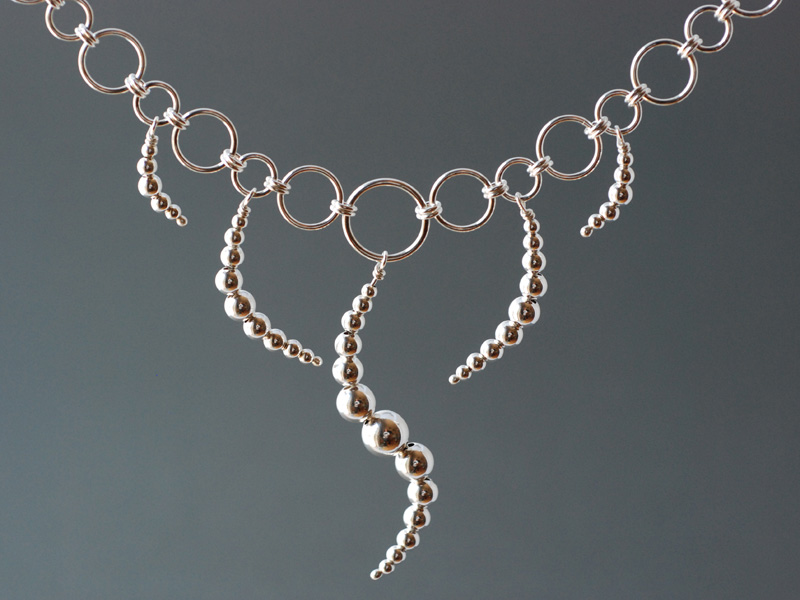 |
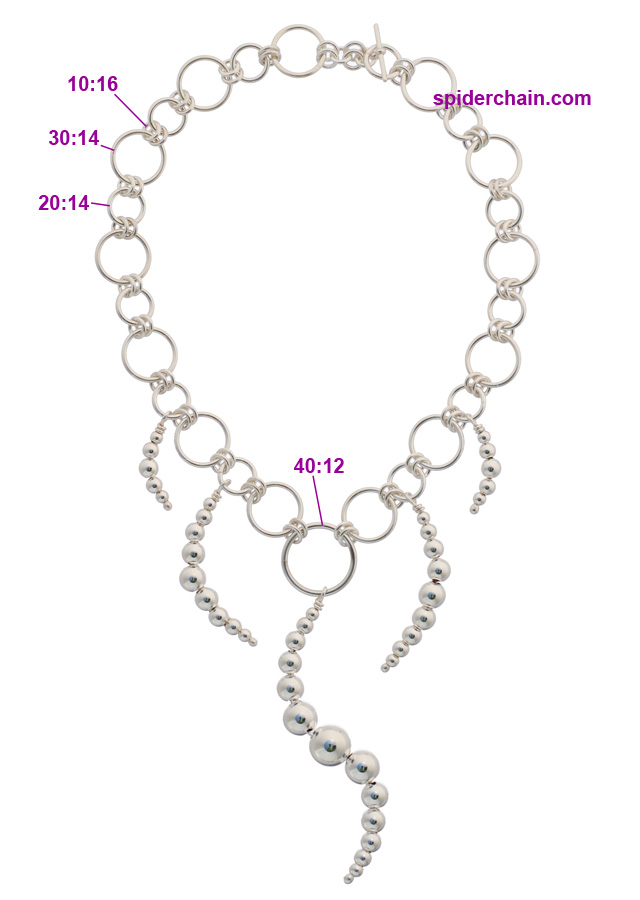 Those two huge sizes (30:14ss and 40:12ss) are non-standard ring sizes. You can find them on the BigAR page. The “pendants” are 16ga Argentium silver (or fine silver) with torch-balled ends. Thread on your sequence of hollow beads, wirewrap the end, and then curve into shape. I’ve misplaced the original necklace – once it surfaces I’ll note which bead sizes I used and create a shopping list for this project. However, don’t limit yourself to my choices! Experiment!
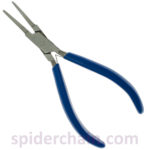
| Duck billed pliers are very helpful for getting the larger rings closed well, without marring the surface. Just remember that (unlike with other pliers) you should come in straight from the sides when using duckbills. |
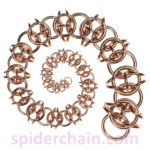
Celtic Snowflake
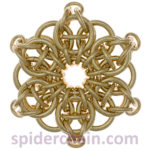
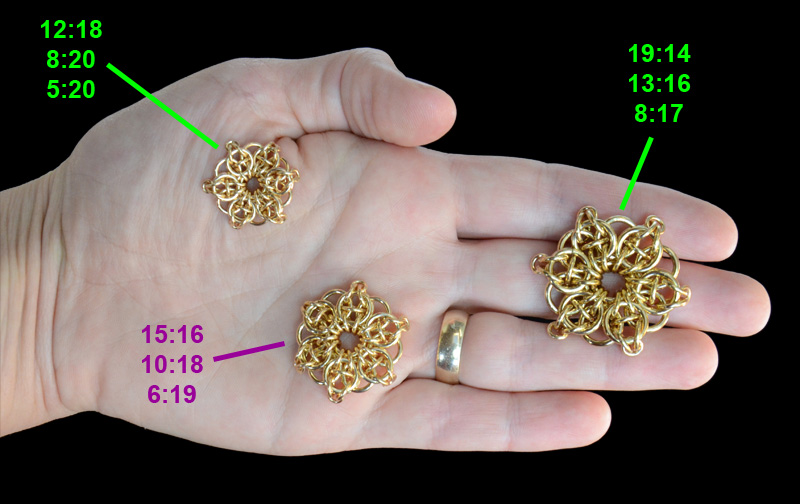 If you wrap Celtic Visions in a circle, you get pretty things! Most people call this pattern Celtic Star, but to me it’s a star if it has five points and a snowflake if it has six points. Your naming may vary. 😉
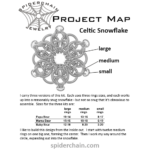
To make a complete snowflake, you’ll need 19 of the large size, 30 of the medium size, and 6 of the small size. Based on my three test snowflakes, I’m pretty certain that this chart is accurate for untested size combinations:
| large rings |
medium rings |
small rings |
|
|---|---|---|---|
| 19:14 | 13:16 | 8:17 | tested in brass (Papa Bear kit) |
| 17:15 | 11:17 | 7:18 | not tested |
| 15:16 | 10:18 | 6:19 | tested in brass (Mama bear kit) |
| 14:17 | 9:19 | 5:20 | not tested – small ring might want to be 6:19 or 6:20 instead |
| 12:18 | 8:20 | 5:20 | tested in brass (Baby Bear kit) |
| 11:19 | 7:21 | 4:21 | not tested |
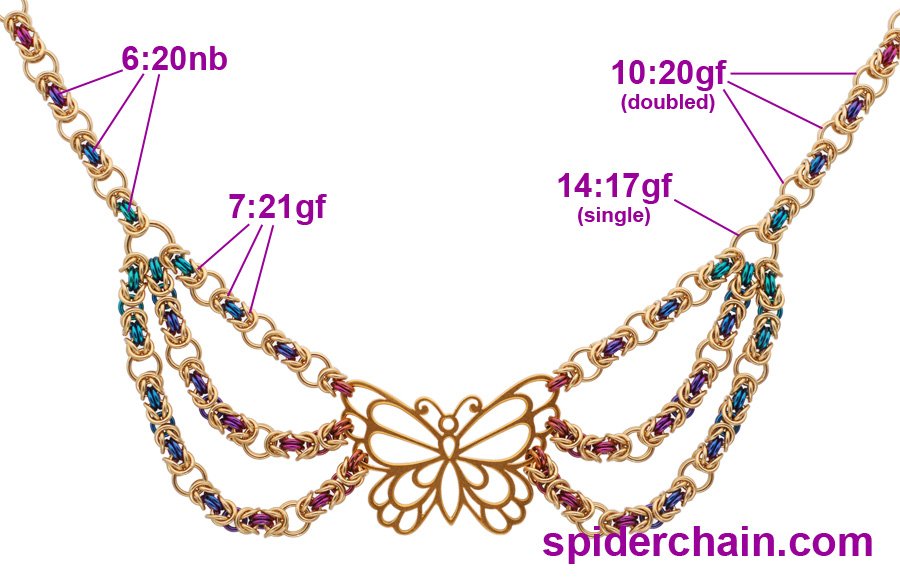
Butterfly Necklace
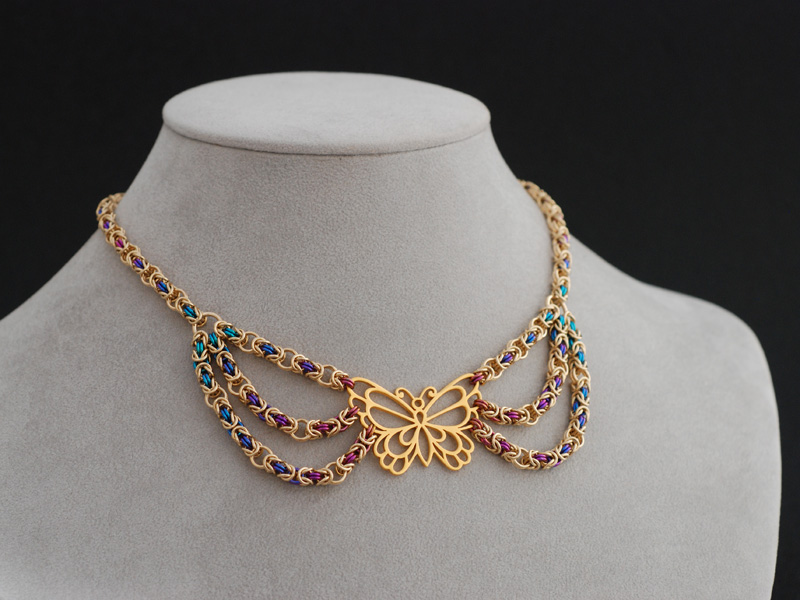
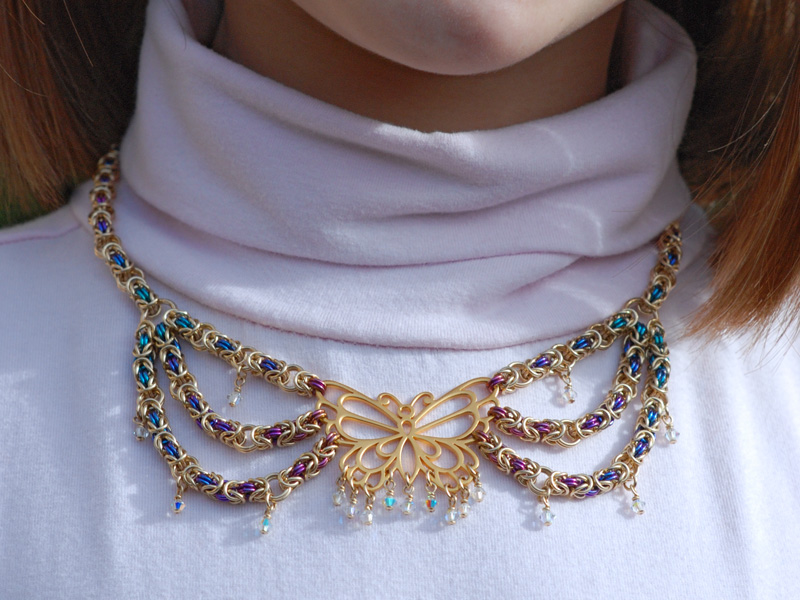 I made this necklace for my daughter to her specifications. Peacock mix niobium, yellow goldfill rings, and 3mm Swarvski bicones in Clear AB. Your bling may vary…(I attached the wire-wrapped crystals with 6:22gf rings, but any small ring would do just fine.)
 You can, of course, use other colors of niobium, or choose other metals altogether. It’s worth noting that I’ve decided to stop carrying the vermeil butterflies – I’m selling my remaining stock at a discount, and then no more. I will continue to stock the sterling silver butterflies.
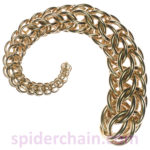
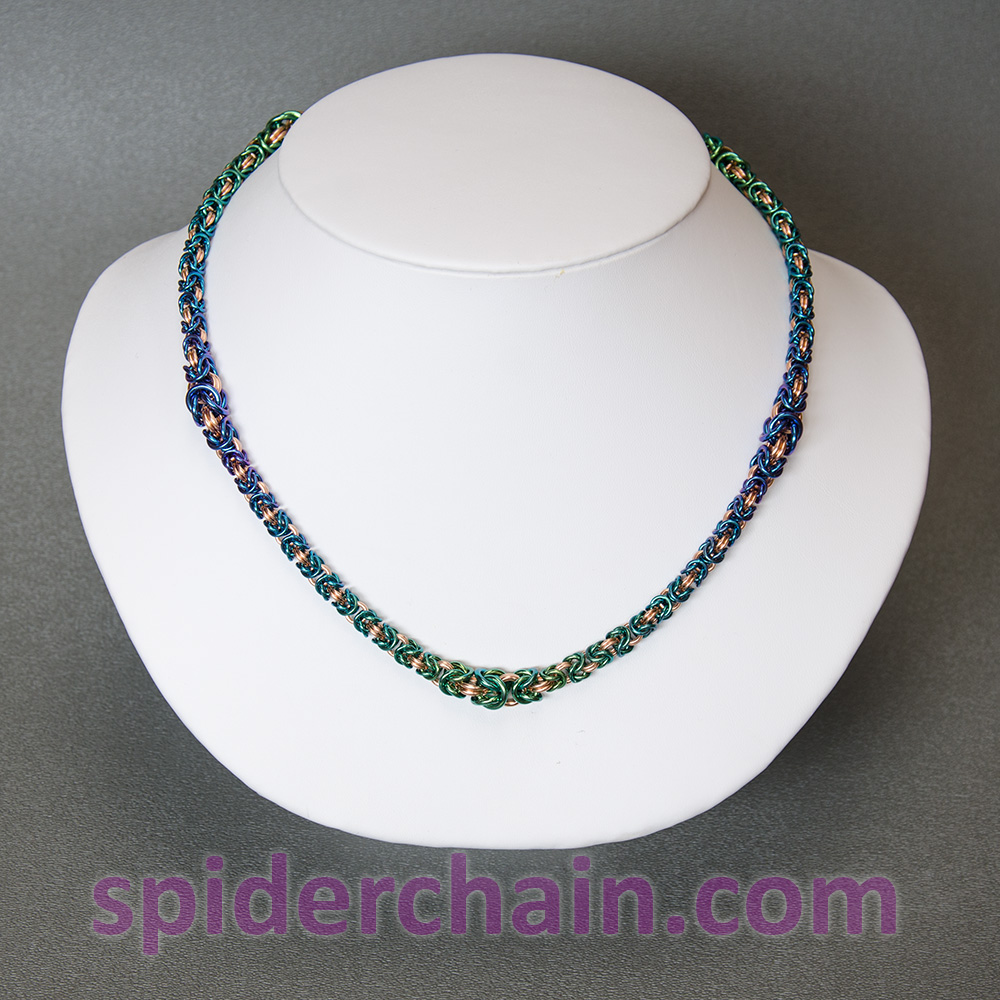
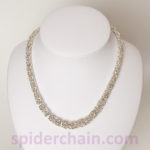
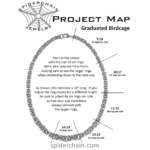
Graduated Birdcage

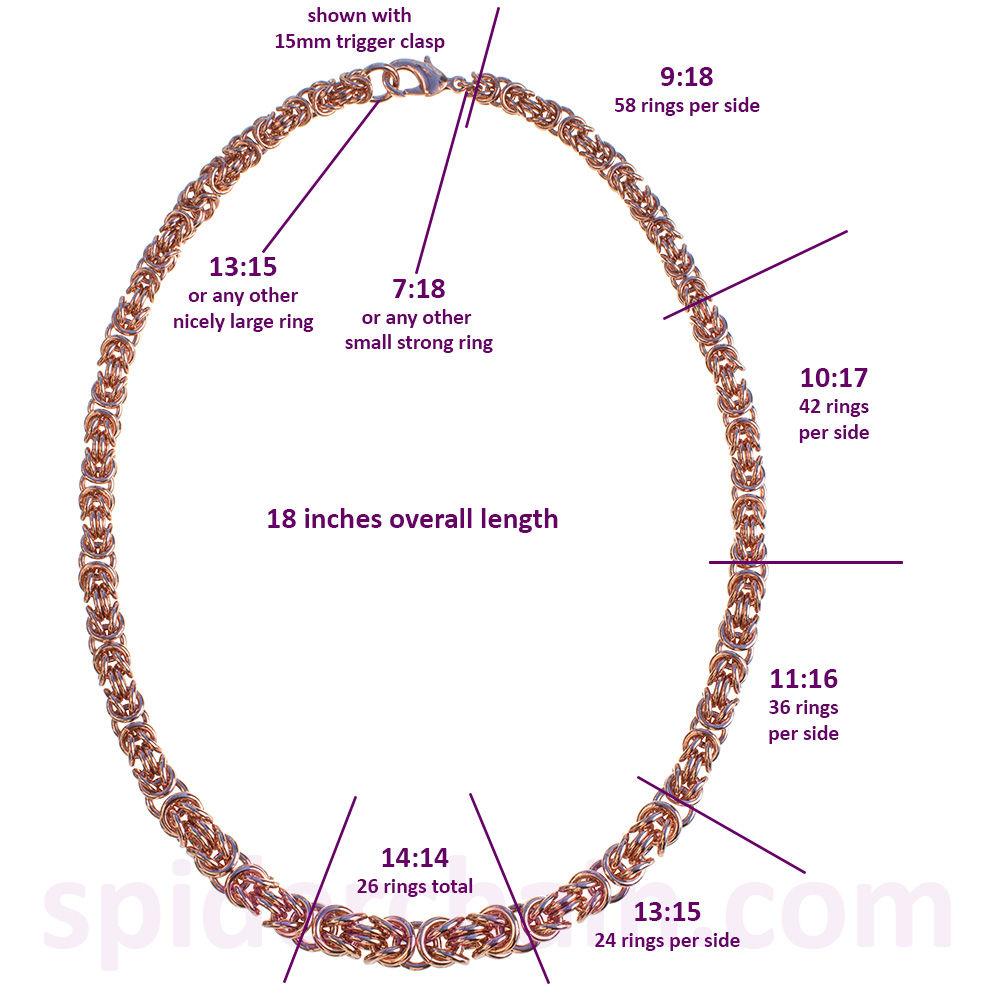 Like most chains, Birdcage is easy to graduate once you know the pattern. I think it works best if you span no more than 5 gauges. (The large sizes will be heavier, and the small sizes will be weaker. Asking 22ga rings to support the weight of 10ga rings won’t work out so well.) And remember to use every wire gauge to make the transition as smooth as possible.
The project map on the left starts with 14ga at the center and drops to 18ga, but you can start with any size and go down – see my recommended sizes chart for other sizes.
Start in the middle with the largest ring size and when you switch sizes, always use the larger size for the connector rings (see picture on right). This avoids running out of room between “birdcages.” You can add/subtract Birdcage segments anywhere to make the size graduation more subtle/dramatic, so long as you do the same to each side. If you don’t know the weave, you can find it on my first DVD, along with six other weaves. (The DVD does not talk about graduated sizes.)
If you aren’t sure what range of gauges you want to work in, I highly (highly!) recommend a base metal sampler pack in Birdcage sizes. Play around with the sizes – sort out which range looks best to you. Once you know which sizes you like, you can get them in silver or goldfill for the “real thing.”
If you want to make it exactly as shown? I’ve created a kit for one-click convenience!
For graduated chains in other weaves, take a look at the other AR sampler packs.
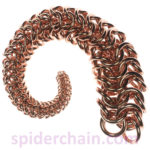
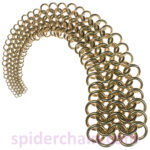
Wiggly 6-in-1
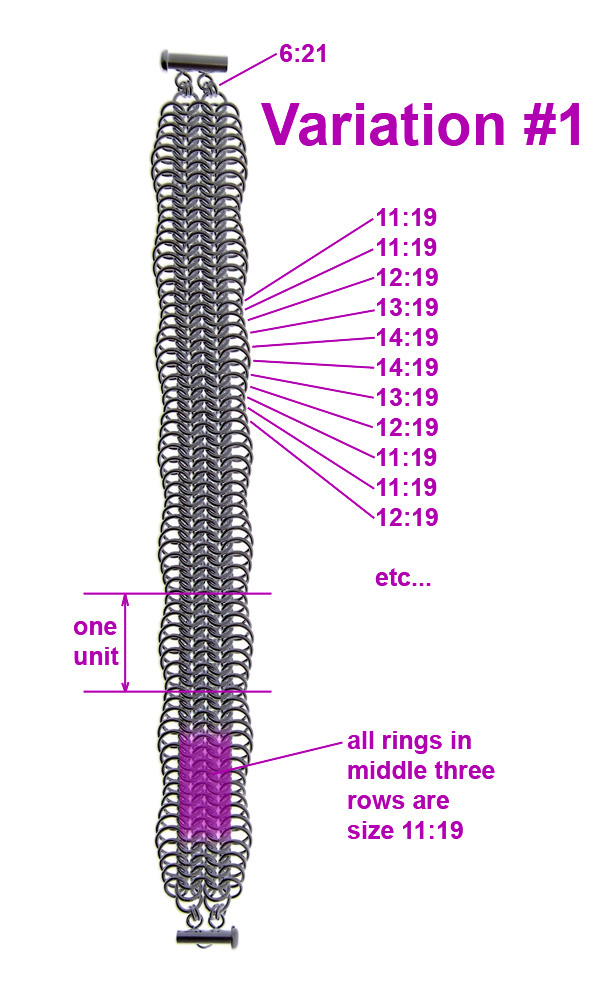
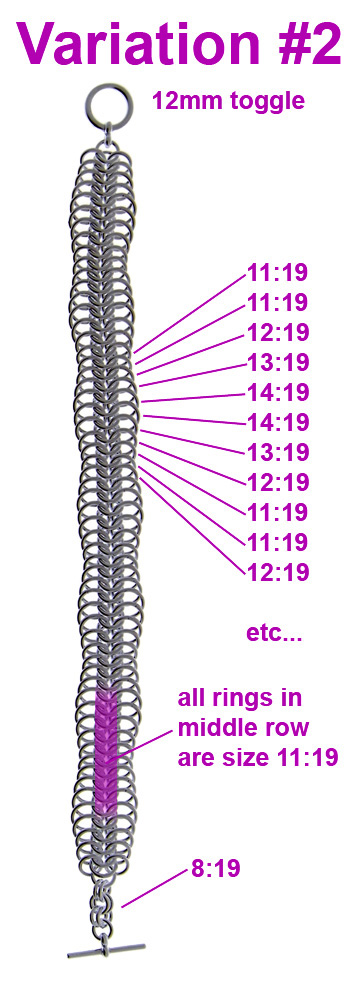
 I love the illusion in this one – a straight chain that really looks like it’s curving! I’ve shown this technique in 19ga, but it can be done in other gauges as well. Use my 6-in-1 size recommendation for that gauge as your main size, and then increase the inner diameter (still in the same gauge) for the “wiggle” rings. You can find size recommendations for other gauges on my recommended sizes chart.
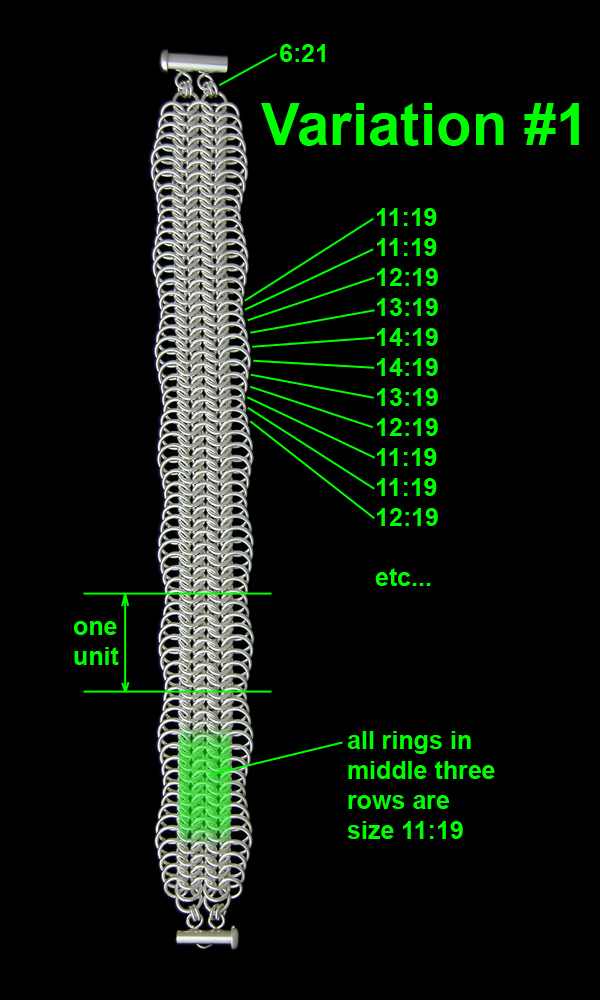
Variation #1 is the easiest. Build a “spine” of European 6-in-1, three rows wide. Then go back and add the wiggly edging to this stable base.
Variation #2 is a little trickier. You need to keep track of the wiggle sizes right from the beginning, but at least the wiggles are symmetrical.
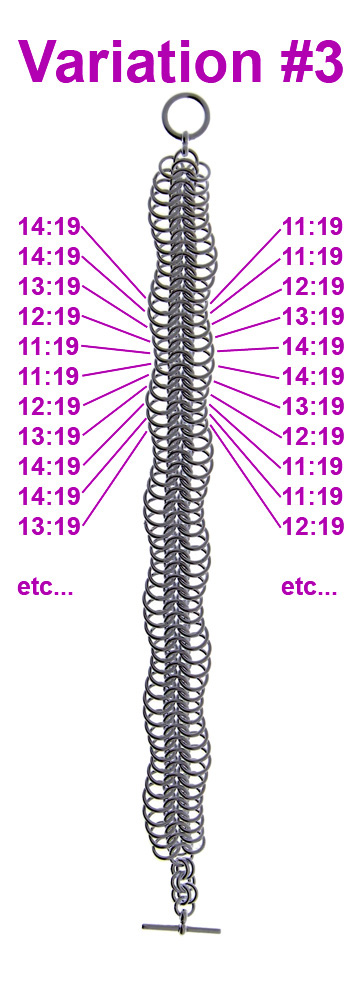
Variation #3 is the trickiest (but still easy enough if you plan ahead). I recommend that you lay out the sequence of ring sizes that you’ll need. Be sure that no cats, children, or gusts of wind will scramble your carefully sequenced sizes! *grin*
ps:
 Just in case you were wondering why the maps for the Graduated Birdcage and Wiggly 6-in-1 are funny-looking, here’s an example of how they started out. These images were originally from my old website, which had a black background. I color-inverted the whole thing so that it would look better on this new, white background – but as you can see, silver chains invert to something a bit… odd.